
howto
Inserting Fittings on Spec-Driven Hoses
How to insert fittings on flexible hoses that mix flexible and straight segments in Spec-Driven Piping.
Flexible hoses in Creo Spec-Driven Piping can contain a combination of flexible and straight segments within the same pipeline.
This becomes important when inserting fittings such as clamps, valves, or other inline components. Creo cannot insert a fitting directly onto a flexible pipe segment, so a short straight segment must first be created at the location where the fitting will be placed.
The general workflow is:
Flexible Hose → Straight Fitting Section → Flexible Hose
1. Define the Fitting Location
Before routing the hose, create two datum points at the desired fitting location:
The first point represents the start of the straight fitting section.
The second point represents the end of the straight fitting section.
The distance between these points determines the straight portion of hose available for fitting placement.
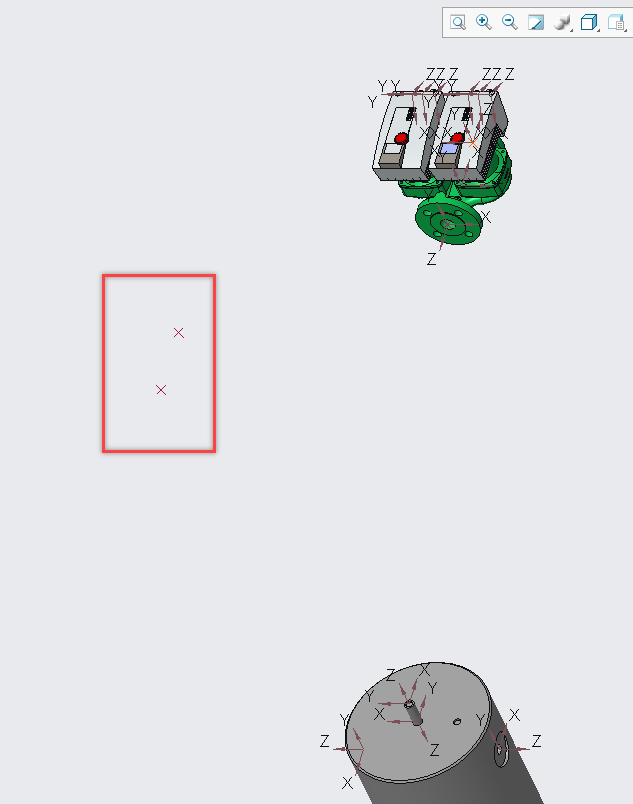
Example of two datum points defining the straight section where the fitting will be inserted.
Tip: Make sure there is enough distance between the two points to accommodate the fitting being inserted.
2. Route the Hose to the First Point
Create or begin routing the Spec-Driven pipeline as you normally would.
Use Set Start → To Pnt/Port to establish the starting location of the hose.
For the flexible portion of the route, open the Piping Environment and set Line Shape to:
Flexible with Free Length
This allows Creo to calculate the flexible hose shape between the routing references.
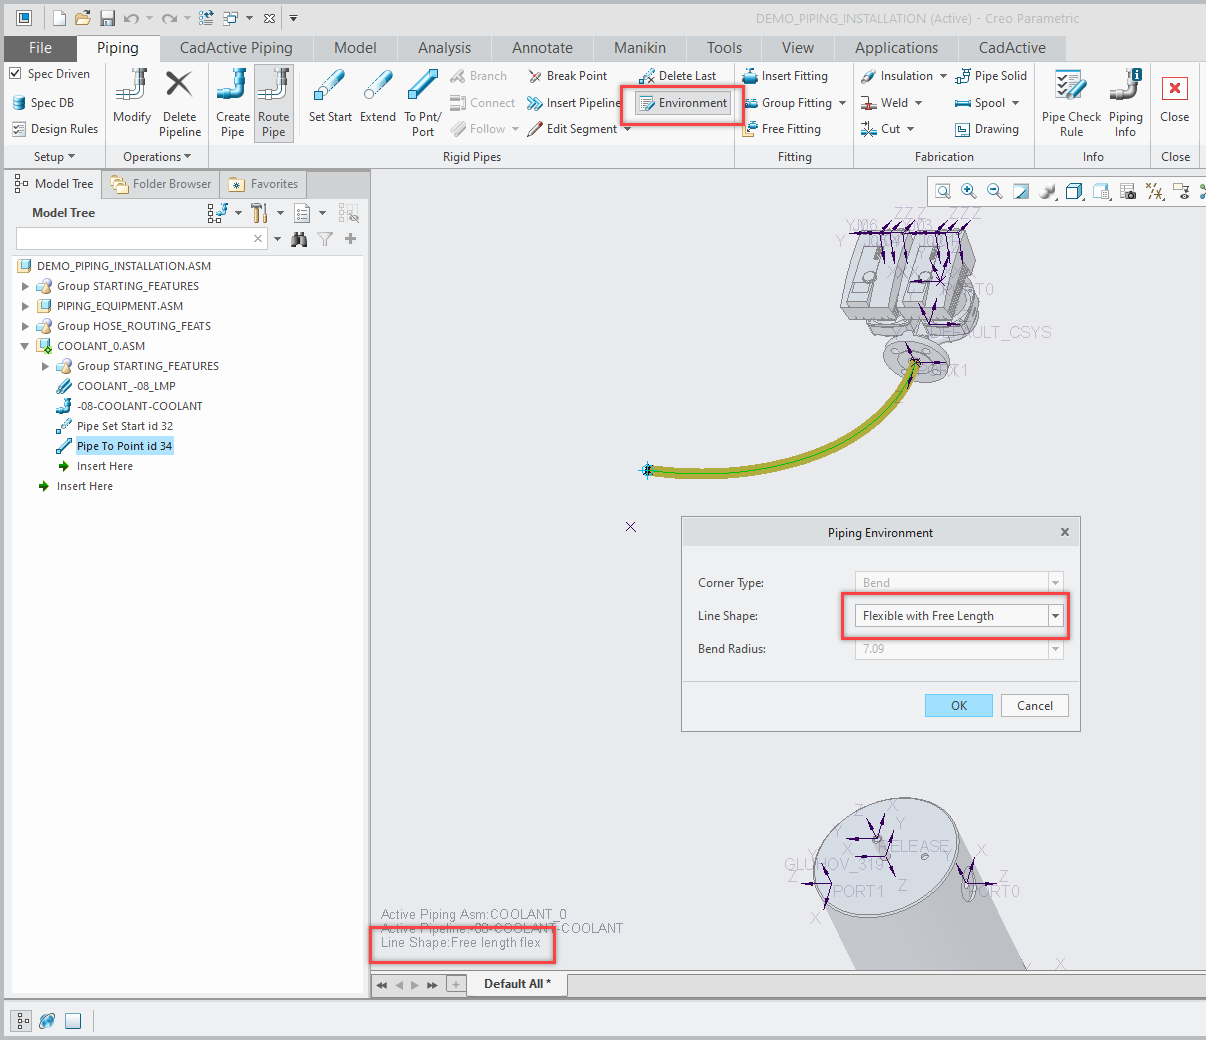
Route the hose to the first datum point using To Pnt/Port.
At this stage, the hose leading into the fitting location remains flexible.
3. Create a Straight Section for the Fitting
Before routing between the two fitting-location points, open the Piping Environment again.
Change Line Shape to:
Straight
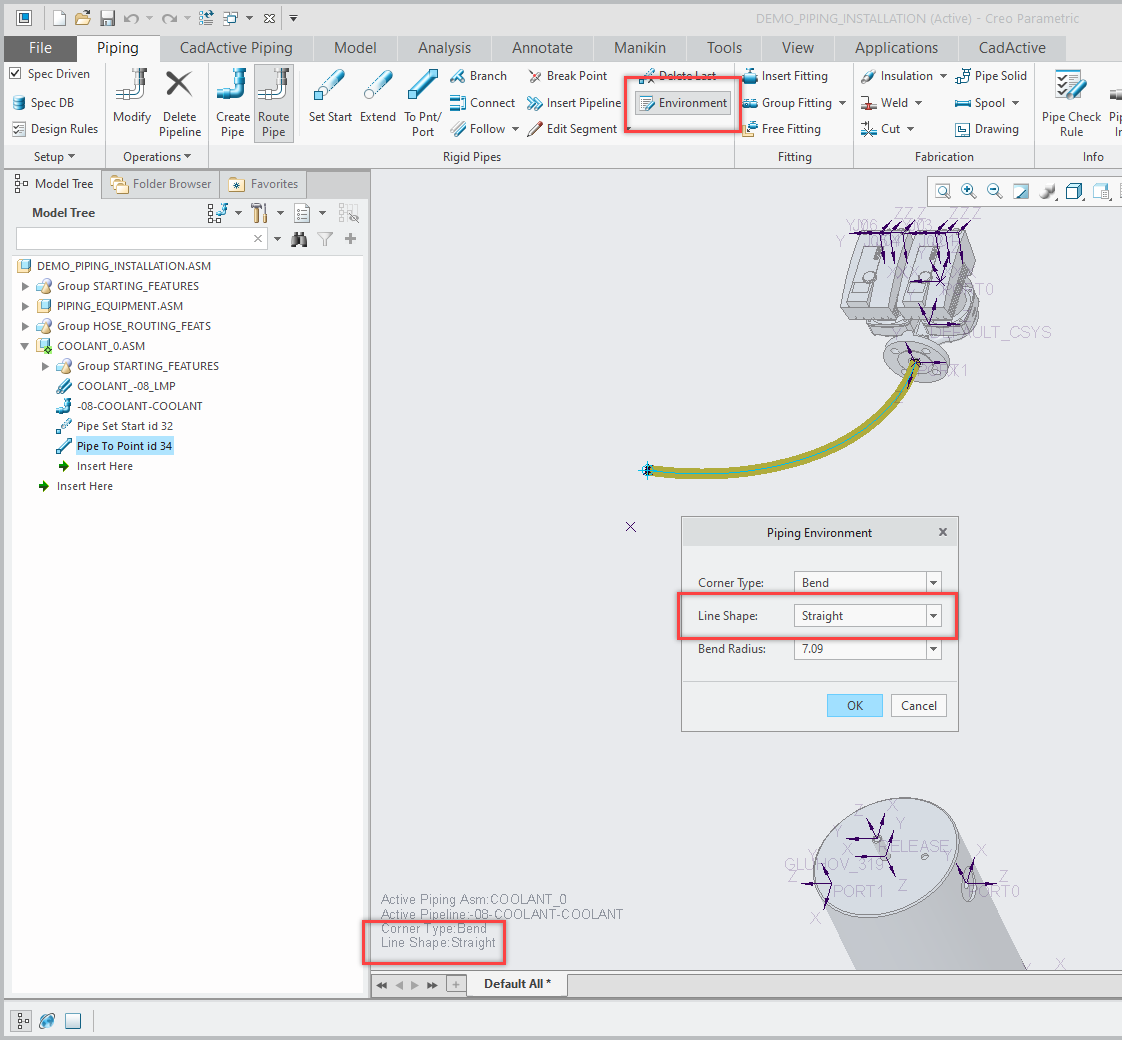
Use To Pnt/Port and select the second datum point.
Creo creates a straight pipe segment between the two points.
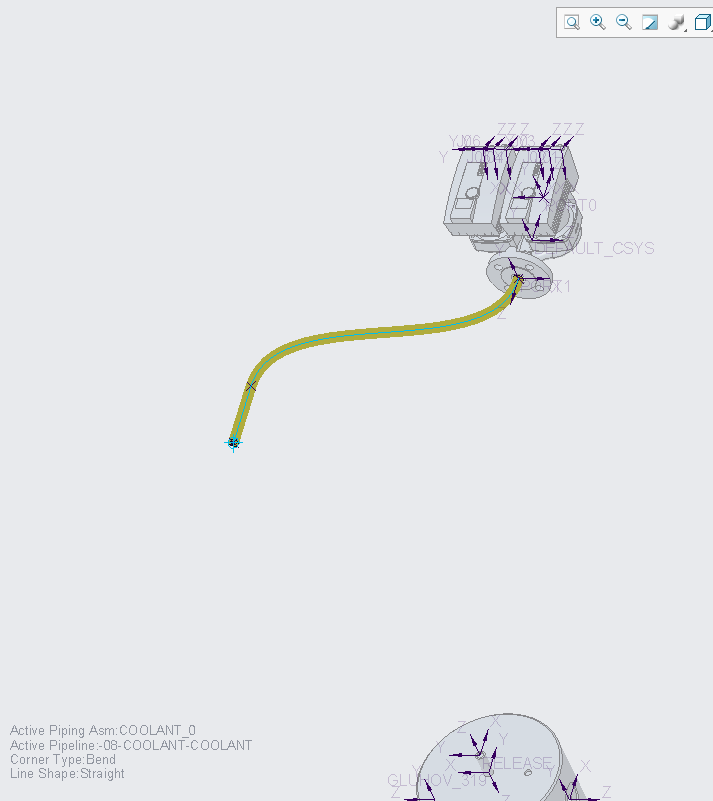
This straight segment provides the location where the fitting can be inserted.
Why is this necessary?
Creo allows fittings to be inserted along straight portions of a pipeline, but not directly onto a flexible pipe segment. The straight section effectively creates a controlled fitting location while allowing the remainder of the hose to remain flexible.
4. Continue Routing the Flexible Hose
Once the straight fitting section has been created, open the Piping Environment again and change the Line Shape back to:
Flexible with Free Length
Continue routing from the second datum point to the final point, port, or coordinate system using To Pnt/Port.
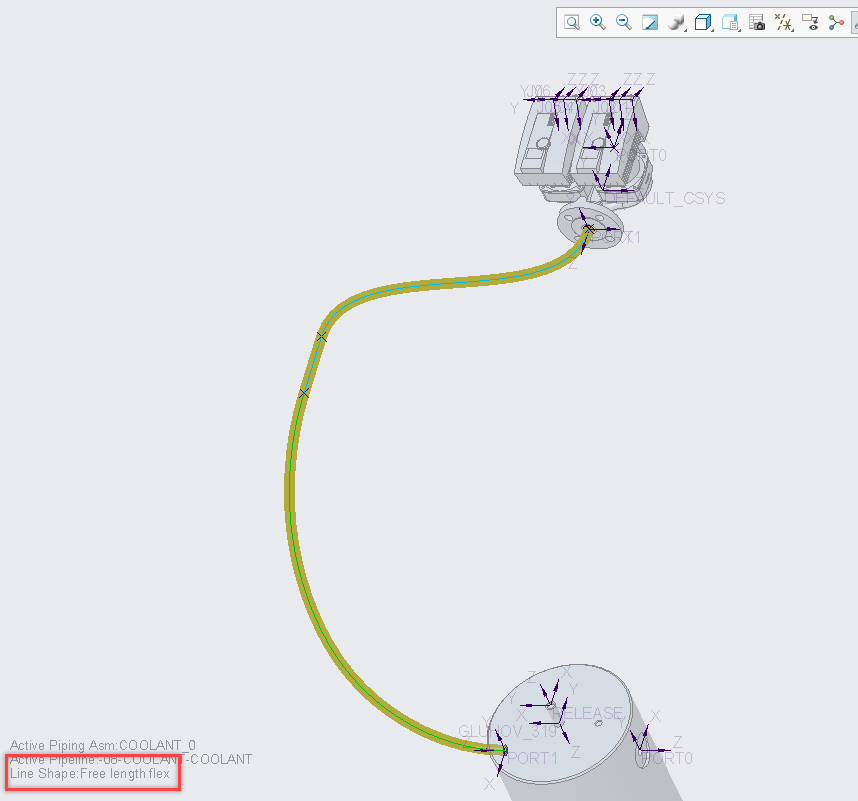
The resulting pipeline should now contain:
A flexible hose section
A short straight section for the fitting
Another flexible hose section
The straight section remains part of the same Spec-Driven pipeline.
5. Insert the Fitting
With the routing complete, select:
Insert Fitting
Select the straight segment between the two datum points as the insertion location.
Choose the appropriate fitting from the available Spec-Driven fitting selections and complete the placement.
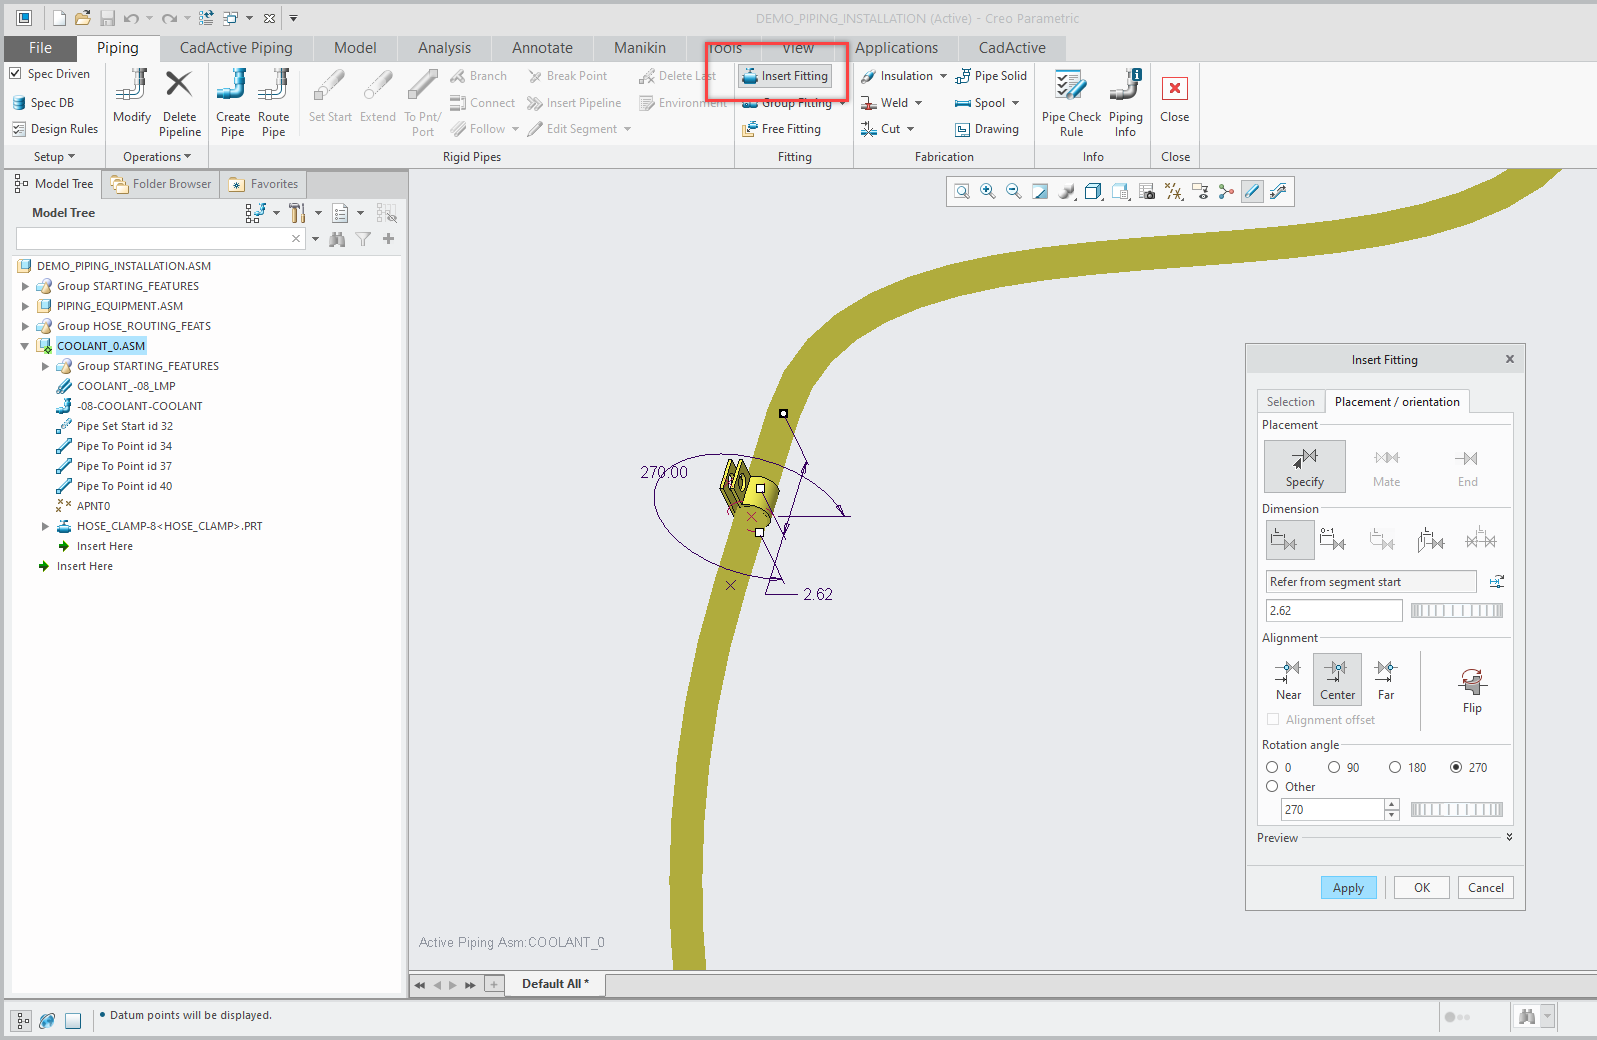
Once inserted through the Piping tools, the fitting becomes associated with the pipeline rather than simply being assembled into the Creo assembly as an unrelated component.
Because the fitting remains part of the Spec-Driven pipeline, Creo can maintain the relationship between the fitting and the piping data as the design changes.
Key Concept
The important part of this workflow is not the fitting itself — it is creating a short straight segment inside an otherwise flexible hose.
When a fitting needs to be placed along a flexible Spec-Driven hose:
Define the fitting location with two points.
Route flexibly to the first point.
Change the Line Shape to Straight.
Route between the two points.
Change the Line Shape back to Flexible with Free Length.
Continue routing the hose.
Insert the fitting onto the straight section.
This allows the hose to retain its flexible behavior while providing Creo with a valid straight segment for fitting placement.
Additional PTC Documentation
For additional information on routing flexible pipes and inserting fittings in Creo Piping, refer to PTC's documentation for: